Student Information
Ewan Pedersen CS2210 9 • 18 • 2024
I am going to skip labeling the steps that don’t require any submission, so the answers will only include terminal screenshots and answers to questions.
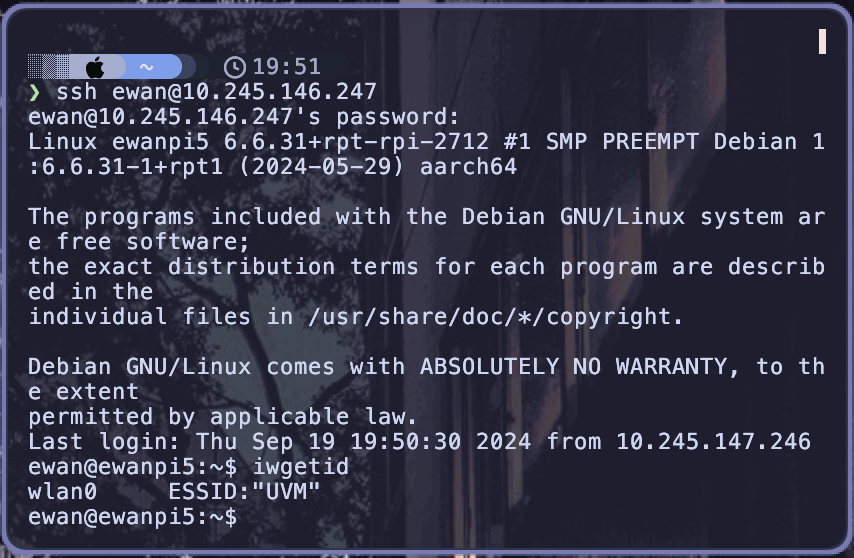
2. If you successfully join a wireless network, typing iwgetid in the terminal should display the network name as follows.
Screenshot
Some Caveats: My Pi did not support md4 hashing due to its age, so I opted to use Sha256 instead.
c19d40e797a1db3e0daa39fda6df3740bdc9b07b91b1989b16c67bbb699aaa7a
4. Create a new folder inside the Desktop folder inyour home directory called CS2210
Screenshot

5. Hostname of the Pi, displaying it via the hostname command.
Screenshot

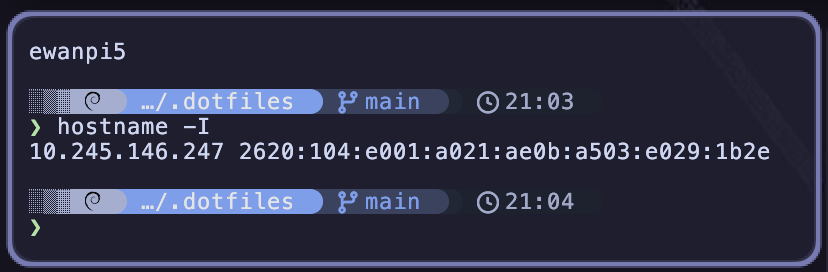
6. IP address of the Pi, displaying it via the hostname -I command.
Screenshot
7. Output of the command: df -T
Screenshot
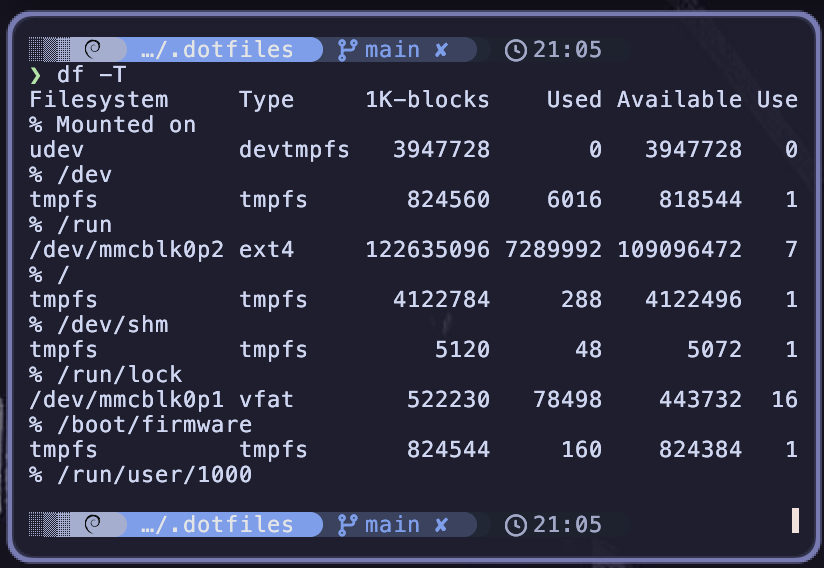
8. What is the file system type listed for the root partition?
From the following screenshot, we can determine that the file system type for the root partition is ext4
Screenshot

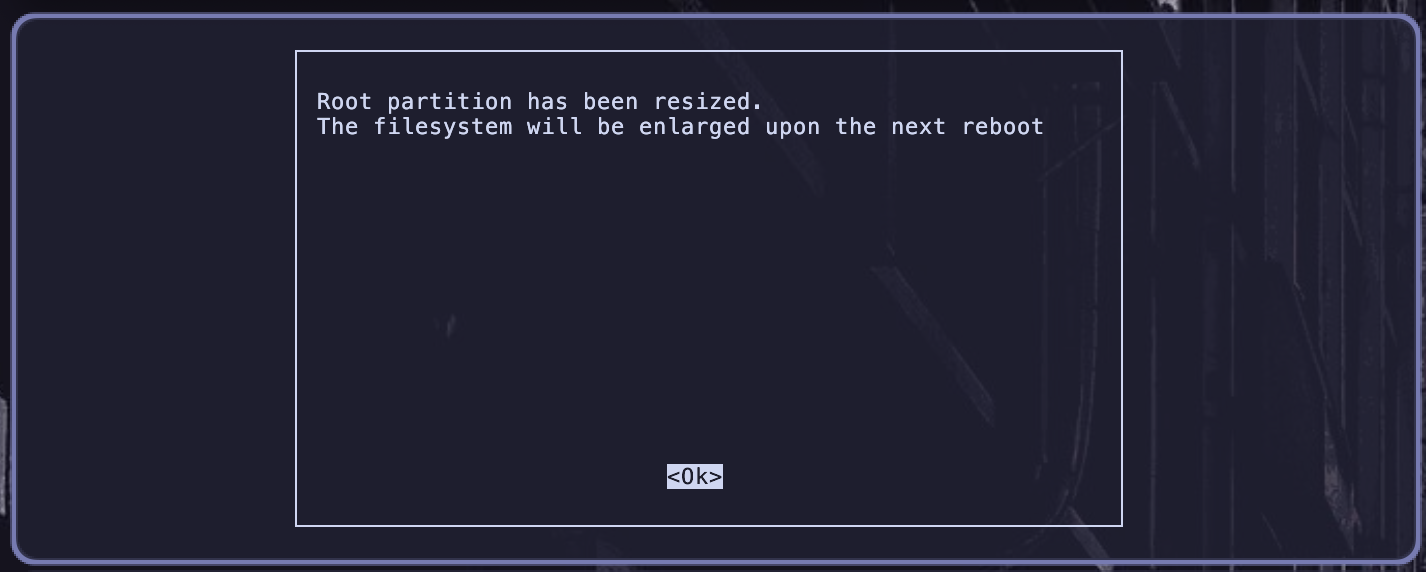
9. Confirmation message that appears after expanding the file system to use the entire microSD card
Screenshot
10. Use the ping command to ping the IP address of UVM’s home page
Screenshot
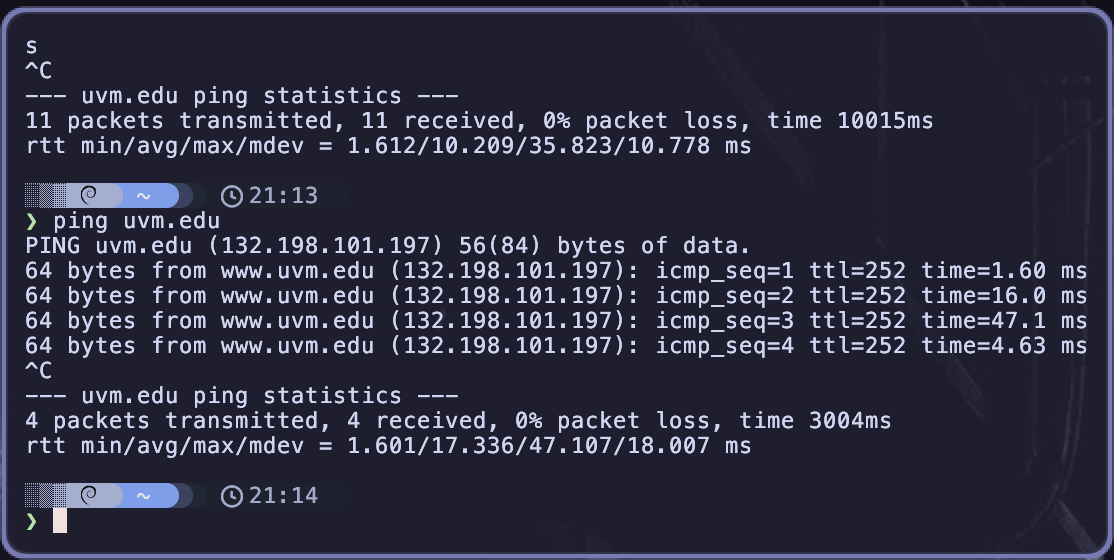
11. What was the average packet round trip time?
Given the following packet times:
- 1.60 ms
- 16.0 ms
- 47.1 ms
- 4.63 ms
We can use the average formula to find this(duh)
Therefore, the average was 17.33ms
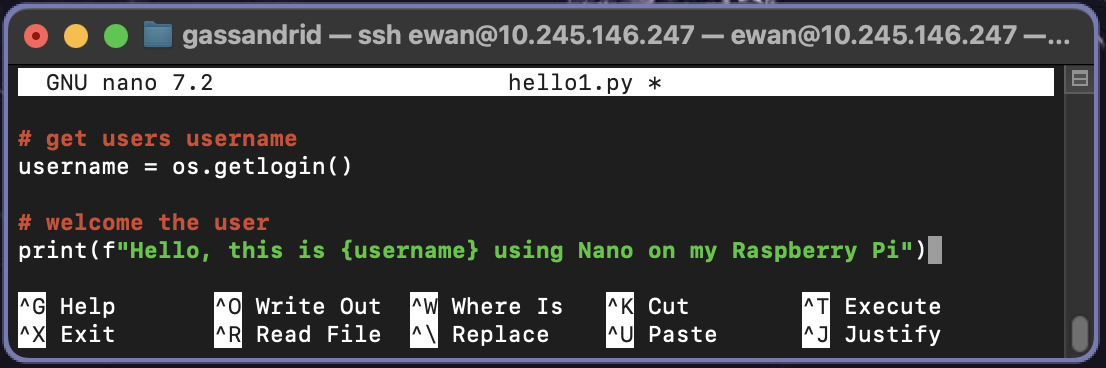
12. Create a Python file using nano called hello1.py. Write a line of code that displays “Hello, this is [your name] using Nano on my Raspberry Pi”.
Unfortunately my terminal emulator didn’t support nano through ssh, so I was forced to use apple terminal! Oh No!
Screenshot
13. Run hello1.py from the command line.
Screenshot

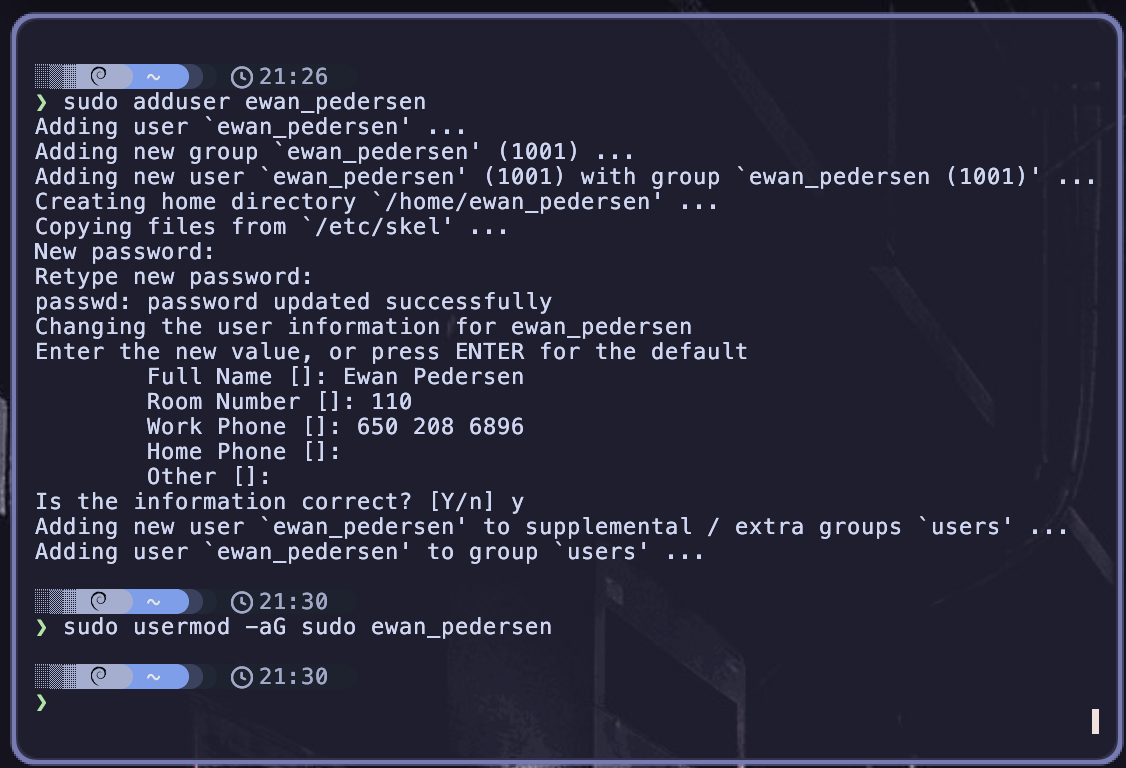
14. Create the following new users and a take a screenshot demonstrating how they were created.
There were other ways to achieve this in the documentation, but I always prefer short bash one liners.
your_name, with sudo privileges
Screenshot
user1, without sudo privileges
Screenshot

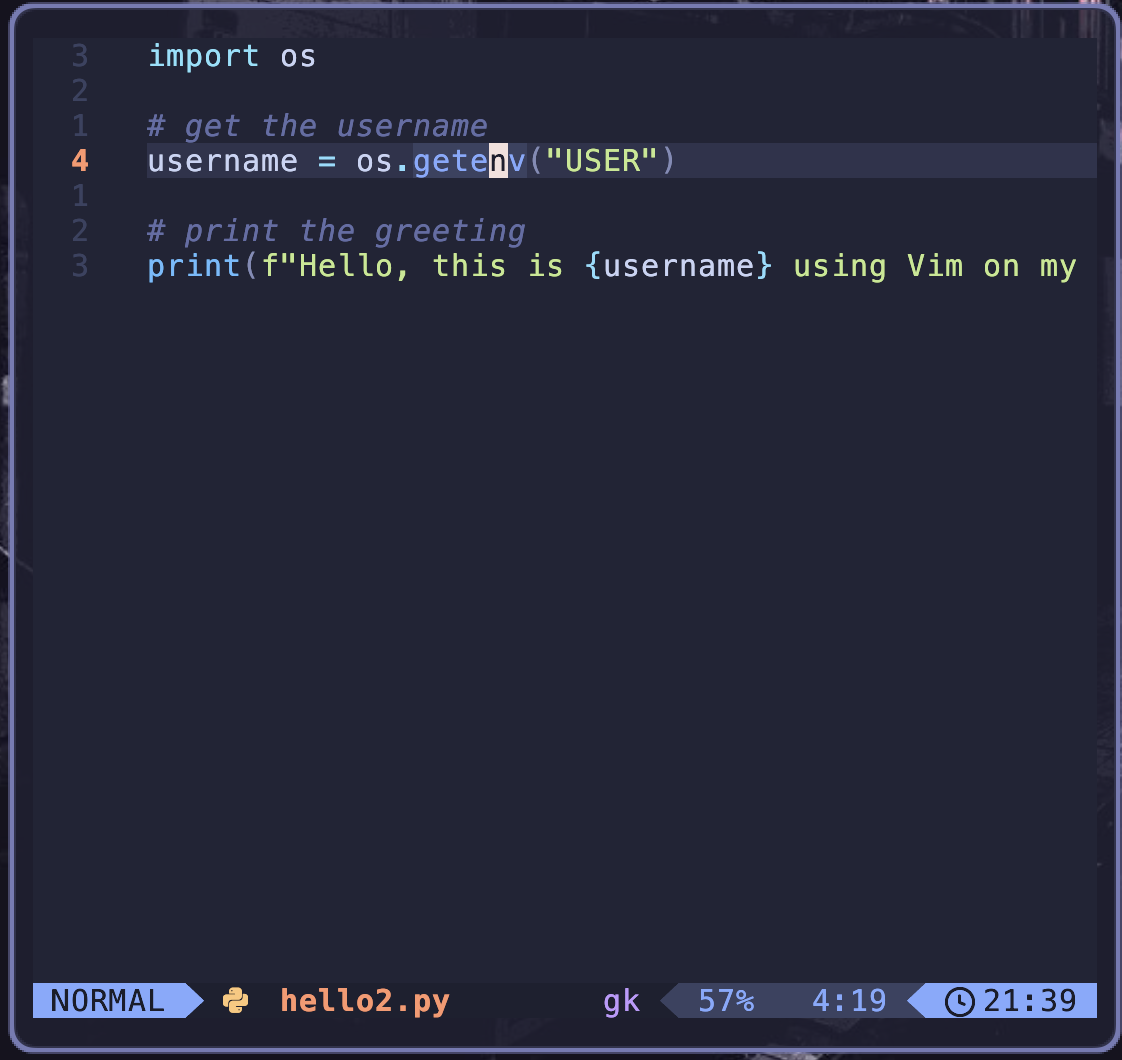
16. Create a Python file using Vim called hello2.py. Write a line of code that displays “Hello, this is [your name] using Vim on my Raspberry Pi”.
Since I already daily drive Vim on my own setup, I went ahead and installed my Vim Dotfile Configuration onto my Pi.
Screenshot
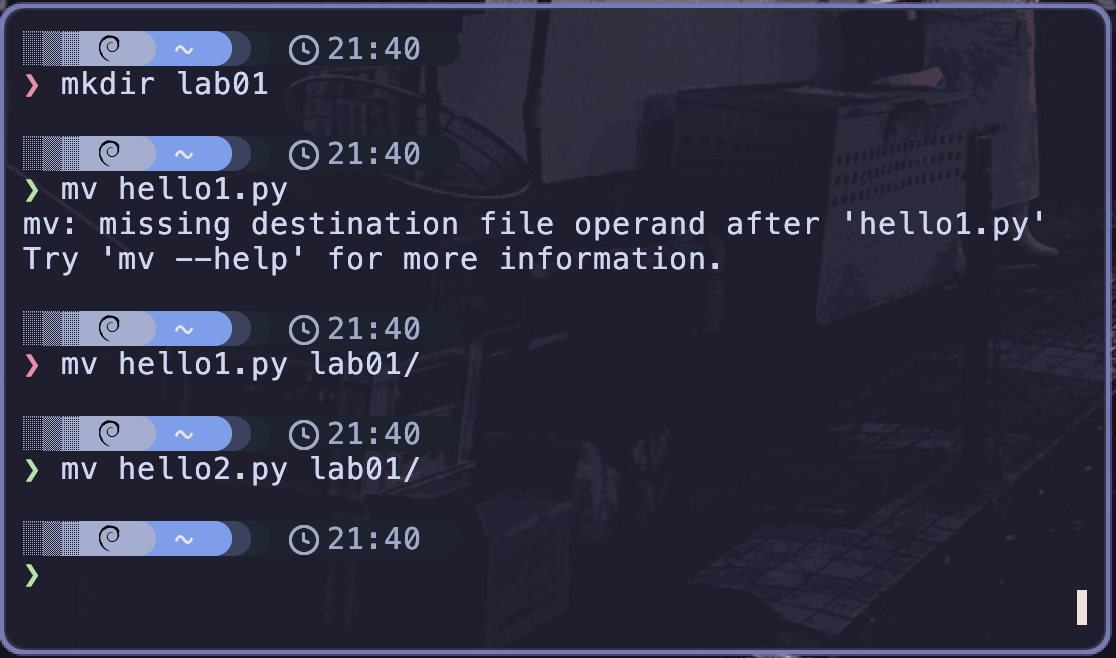
17. Create a directory called lab01 using the mkdir command, and use the mv command to move hello2.py into it.
Screenshot
18. Execute hello2.py via the command line
Screenshot

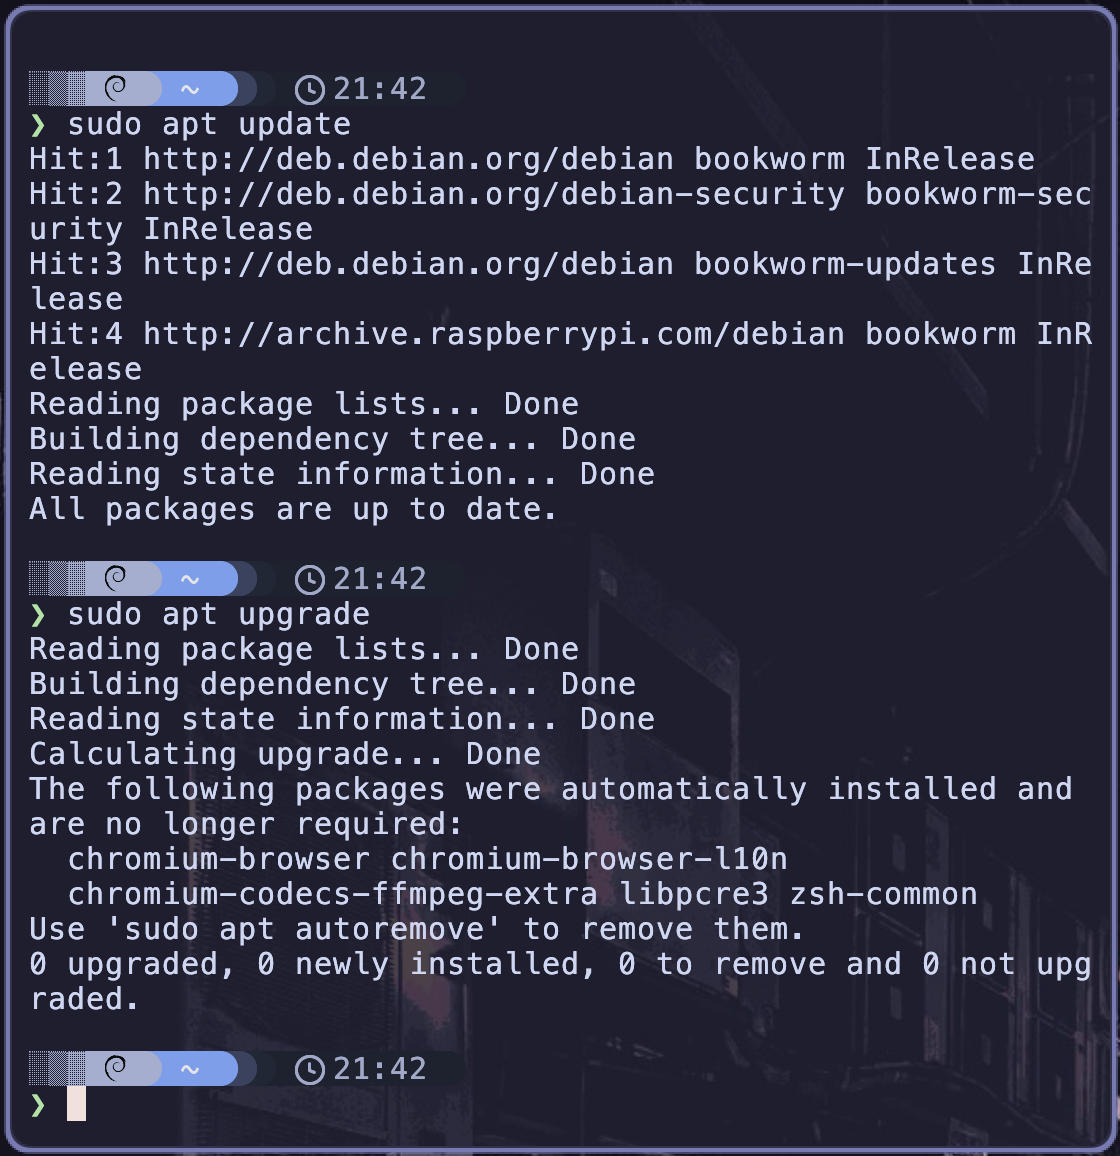
19. Install any recent updates to your Raspberry Pi OS distribution via sudo apt update and then sudo apt upgrade
Info
Screenshot